No matter how hard you will try or how much lubrication you will apply to your spring or springs, they will break.
Springs are rated for a certain amount of cycles, and when that number is reached, the unavoidable will happen, and the spring will snap.
If you think your DIY still are up to par you may opt for a DIY spring replacement in this full guide with pictures that we have compiled for the brave ones
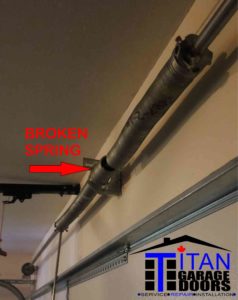
First step
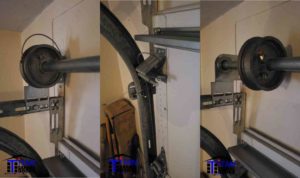
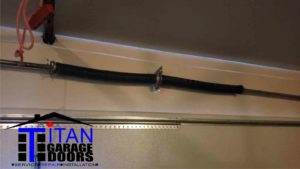
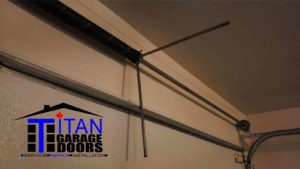
located the spring and check for breakage
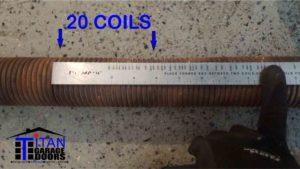
measure the spring wire gauge, our technicians use a spring gauge, and you measure a spring wire size by counting 20 coils
when replacing torsion springs, we go by the rule of thumb “Use the same size spring” The size and weight of the door engineers all garage door springs.
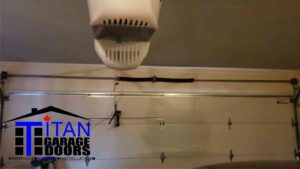
NOTE: You can skip the next step if you have a single-spring garage door counterbalance system.
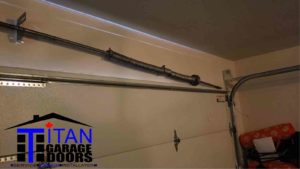
Start removing the tension from the second spring.
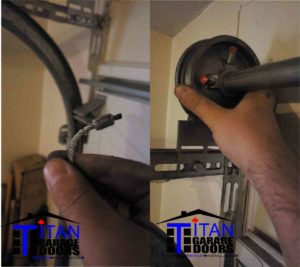
You have to insert proper winding bars into the winding cone to remove the tension. Make sure the winding bars are fully inserted into the winding cone
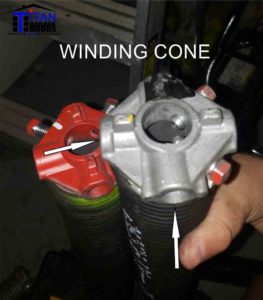
At the same time, unscrew the setscrew to release the torsion spring from the torsion tube AT THIS POINT THE FORCE OF THE SPRING WILL TRANSFER TO THE WINDING BARS

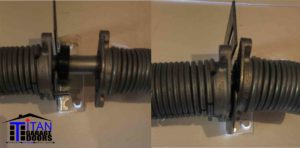
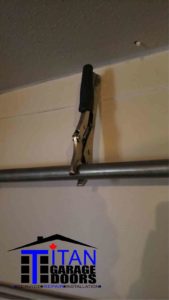
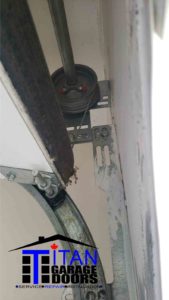
After removing the tension on the spring, remove the 9/16 bolts that connect both springs on the center plate.
release the setscrew on both drums and secure the cable on the top fixture to prevent the aircraft cables from falling down; slide the cable drum towards the spring to allow the torsion tube to move
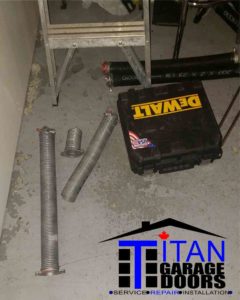
slide the torsion shaft to one side and slide both spring/s drums and bushing
remove broken spring/s
reverse the whole process, starting with the springs
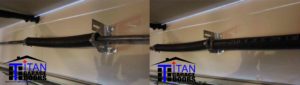
secure springs to the center plate with the bushing or ballbearing, use the 9/16 bolts with an impact driver using a deep socket or a socket wrench
Install cable drums and cables
install cables on cable drums
Pro tip: bend the cable for easier application
tighten the setscrews on drums when the cable is in the proper position and secure the torsion tube to prevent the cables from falling
wind the torsion spring 4 quarter turns for each ft of the garage, to the point where achieving a well-balanced garage door
check for cable tension on both cable drums when the garage door is in the open position
AND… DONE!
If you are struggling at any point, always contact a professional garage door technician for assistance.